Do you remember ?
Background
I was inspired by this LED T-Shirt project. But the LEDs and the housing seemed not flexible enough for my needs. Finally the hardware requirements consist of both Raspberry Pi and Arduino. That seemed to much for a simple ticker. Why not only use one of both? And it must be small!
So I looked around as usual and after some time I found a flexible LEDMatrix that seems to be suitable because of cost, flexibility of the LEDs and wireless connectivity. Finally Arduino LED Ticker project seems a little bit better because it offers an accesspoint and allows wireless configuration without reflashing the chip.
With massive help of my friend Christian (many, many thanks for that!) and our monthly meeetings at our local greek the project finalizes in autumn 2019.
Right in place for the annual CodEx Conference at HDI insurance 2019 where I had the debut when connecting the scrolling text with a Camunda process. An rapid prototyping approach combining omnichannel, RPA, IOT together with a sinple BPMN process that runs on nearly 100% opensource components and demos everything only with the use of an editor and the Camunda modeler. Though it was not planned the second time the project was shown during a discussion about a t-shirt look and feel at CamundaCon live during Covid time which was organized as online conference instead of being held in New York on 23.04./24.04.2020 by Camunda.
Here’s a short and fast howTo to do it on your own.
Parts list
-
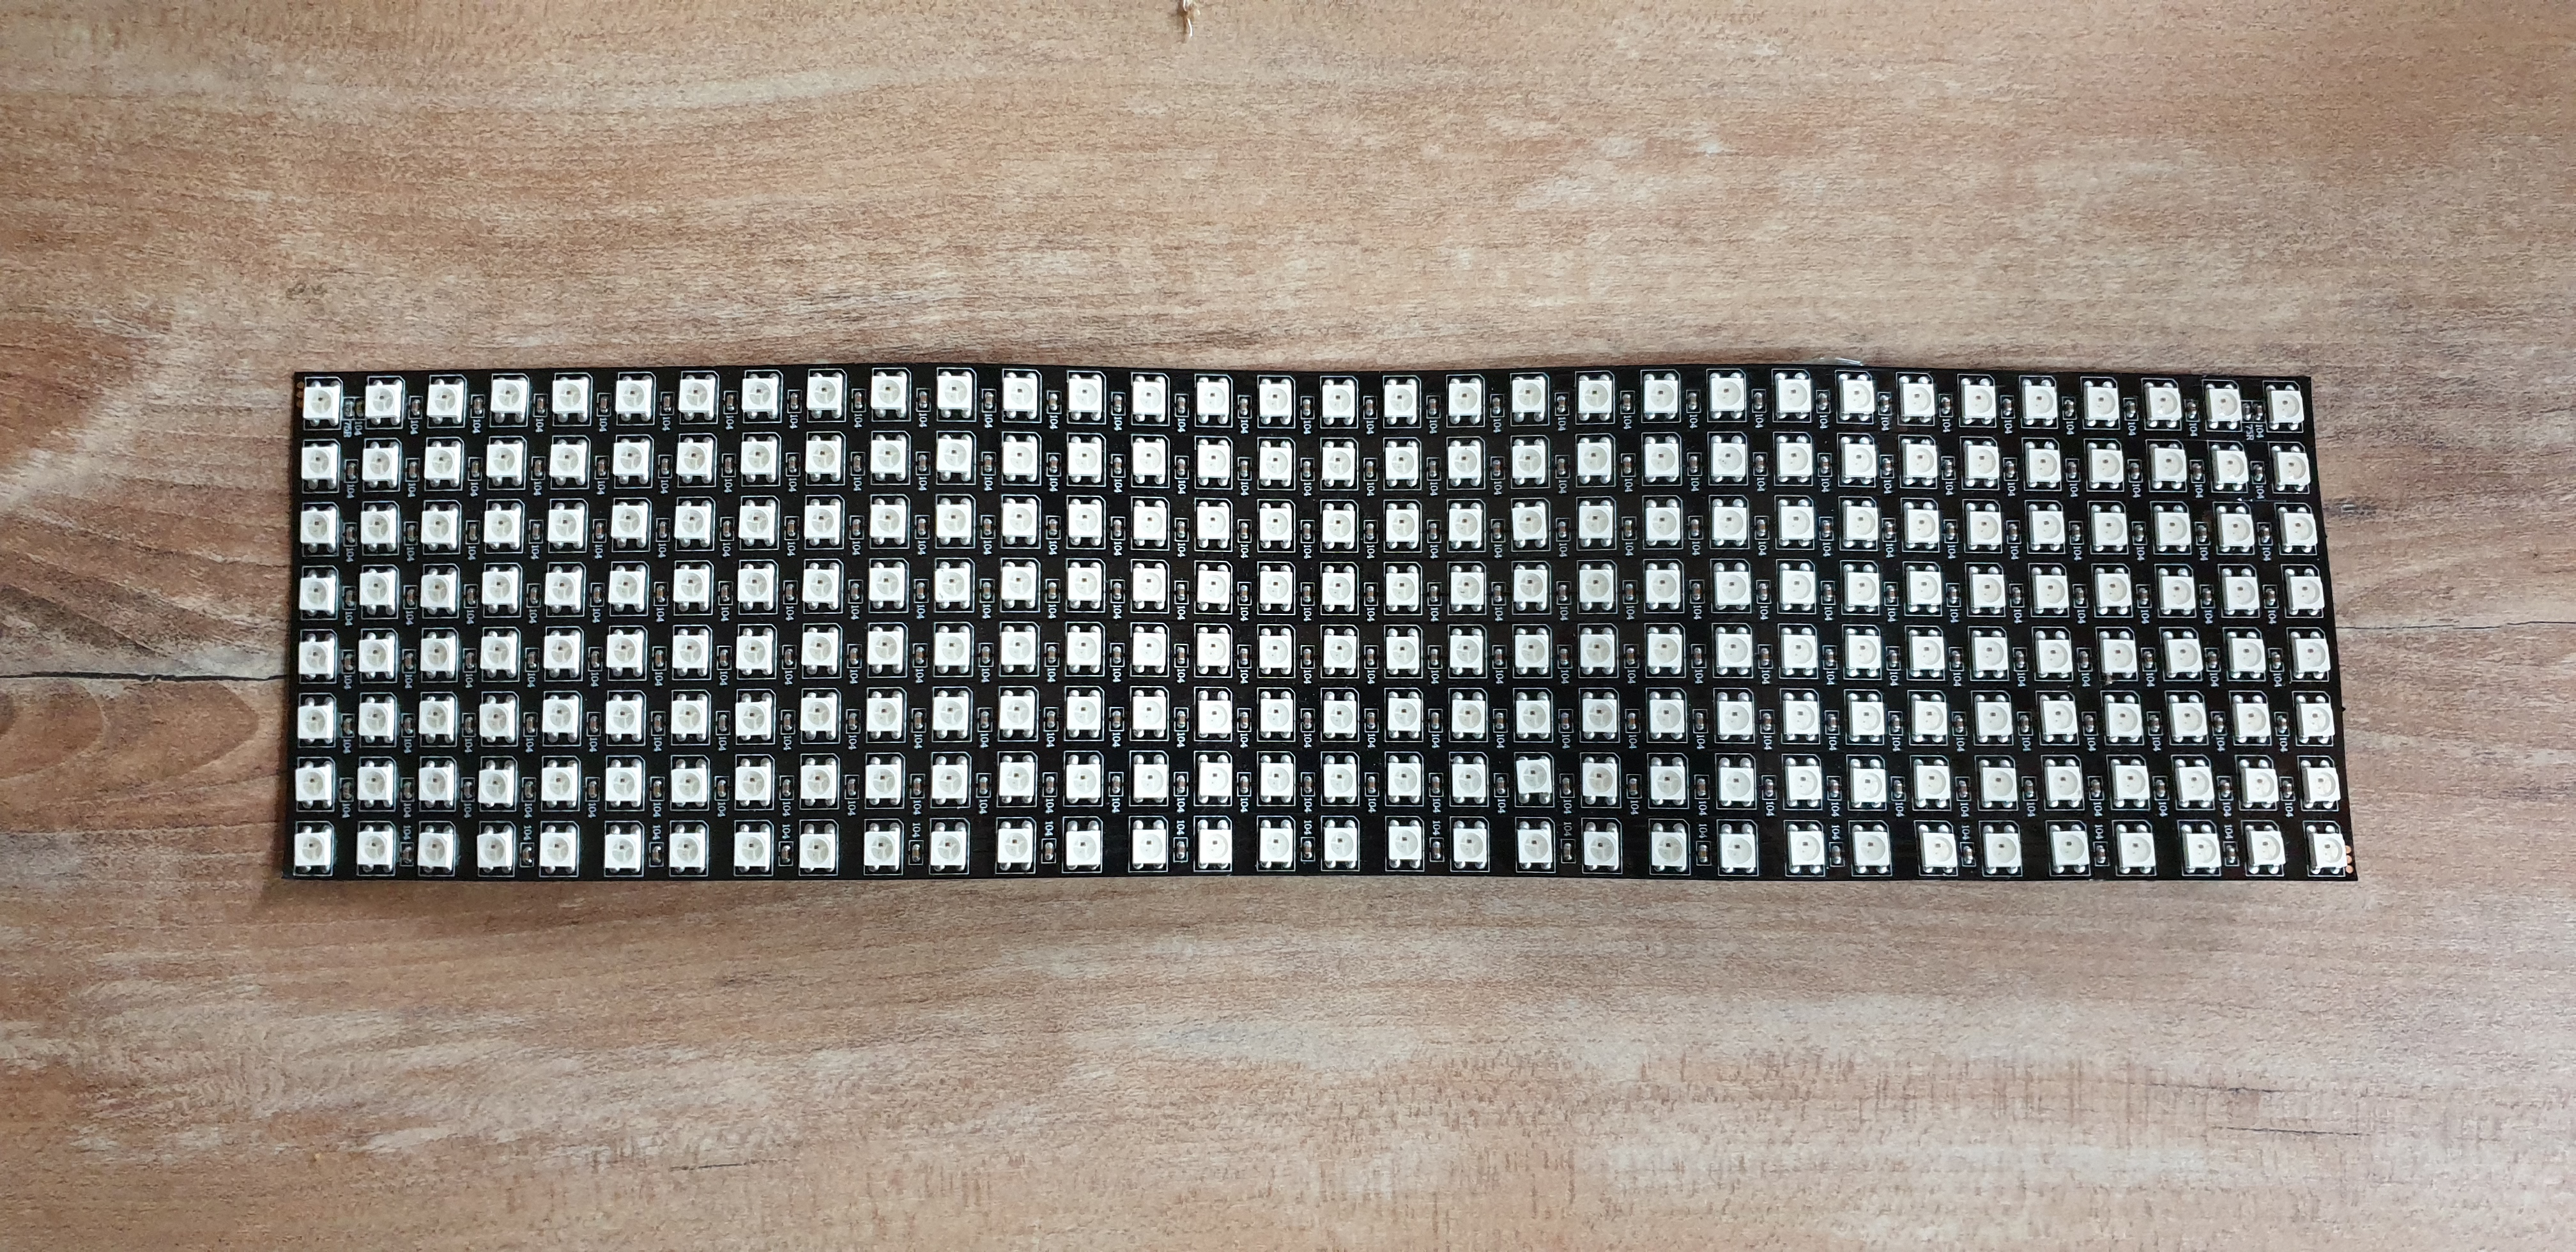
Search for “LED Matrix, WS2812” based. I’ve used a 8x32 matrix. Look for a LED matrix that is supported by the Adafruits Neopixel Library.
- https://nl.aliexpress.com/item/32776887881.html costs: ~20€
- https://nl.aliexpress.com/item/32776887881.html costs: ~20€
-
ESP32 like board with WiFi and Micro-USB Port I would prefer a small size to hide it in the back of the matrix deplay. Search for “Wemos D1 mini”.
- https://m.nl.aliexpress.com/item/33039197277.html or
- https://www.amazon.de/IZOKEE-NodeMcu-Internet-Entwicklungsboard-Compatible/dp/B076FBY2V3
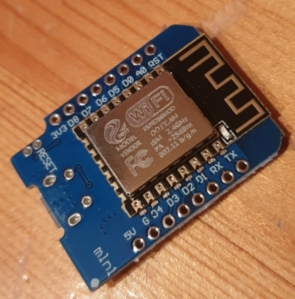
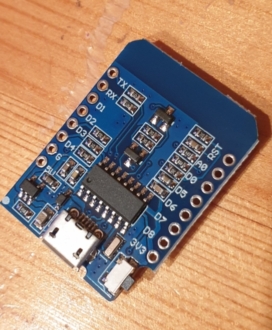
or a little bit larger but should also be small enough - search for “NodeMCU” in the net.
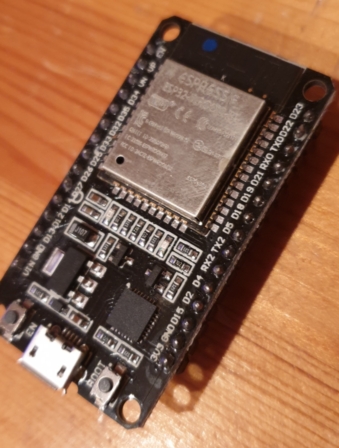
Each of both should not cost more than 10€.
- Solder, soldering iron
- some cables to connect the matrix with the ESP32 if not included in the matrix package
- Powerbank
- Micro-usb cable
- Duck tape
- and finally of course: a t-shirt :-)
Knowledge / requirements not covered here:
- Soldering…you should be able to solder 6 relativ easy connections.
- Download Arduino IDE
- Know How to Compile Arduino Sourcecode via USB for the ESB32 Board. If you’re new to this - look for sth. like “Getting started with the Arduino IDE”
Downloads
I couldn’t use all of the original sourcecode from the Arduino LED Ticker project License: MIT, author: justcallmekoko.
This project includes a Wifi AP feature if no predefined wireless network could be found.
I don’t know why but it works not stable enough and always freezes. So I removed the AP part and created my own version in which you can only use a predefined wifi network.
Download my version of Wifi_ticker License: MIT.
Perhaps I’ll re-add the AP feature in the future but that would cost some time.
Configuration:
- Make the following settings (network, etc ):
#define PIN D3 //Modify D3 to the used data pin of the ESP/Wemos/NodeMCU you connect the data wire to the matrix display

#ifndef STASSID
#define STASSID "your wifi ssid"
bool run_display = true;
#define STAPSK  "your wifi password"
#endif

...

// Ticker Settings
String ticker_message = " "; //Put a possible default start message here
int width = 32;            //Dimension of your LED Matrix
int height = 8;            //Dimension of your LED Matrix

 // Matrix Settings modify according to the LED Matrix (see backside how the LEDs are connected)
 //details can be found on the Adafruit page (link below) - this is my config here
Adafruit_NeoMatrix matrix = Adafruit_NeoMatrix(width, height, PIN,
  NEO_MATRIX_TOP    + NEO_MATRIX_LEFT +
  NEO_MATRIX_COLUMNS + NEO_MATRIX_ZIGZAG,
  NEO_GRB            + NEO_KHZ800);

...

##### optional:
//some configs - see neopixel doc for details
  matrix.setTextWrap(false);
  matrix.setBrightness(50);
  matrix.setTextColor(colors[6]);

...
      x = matrix.width();
    }
    matrix.show();
    delay(80); //the speed of the scrolling display
  }
- Compile it and flash it to chip via usb.
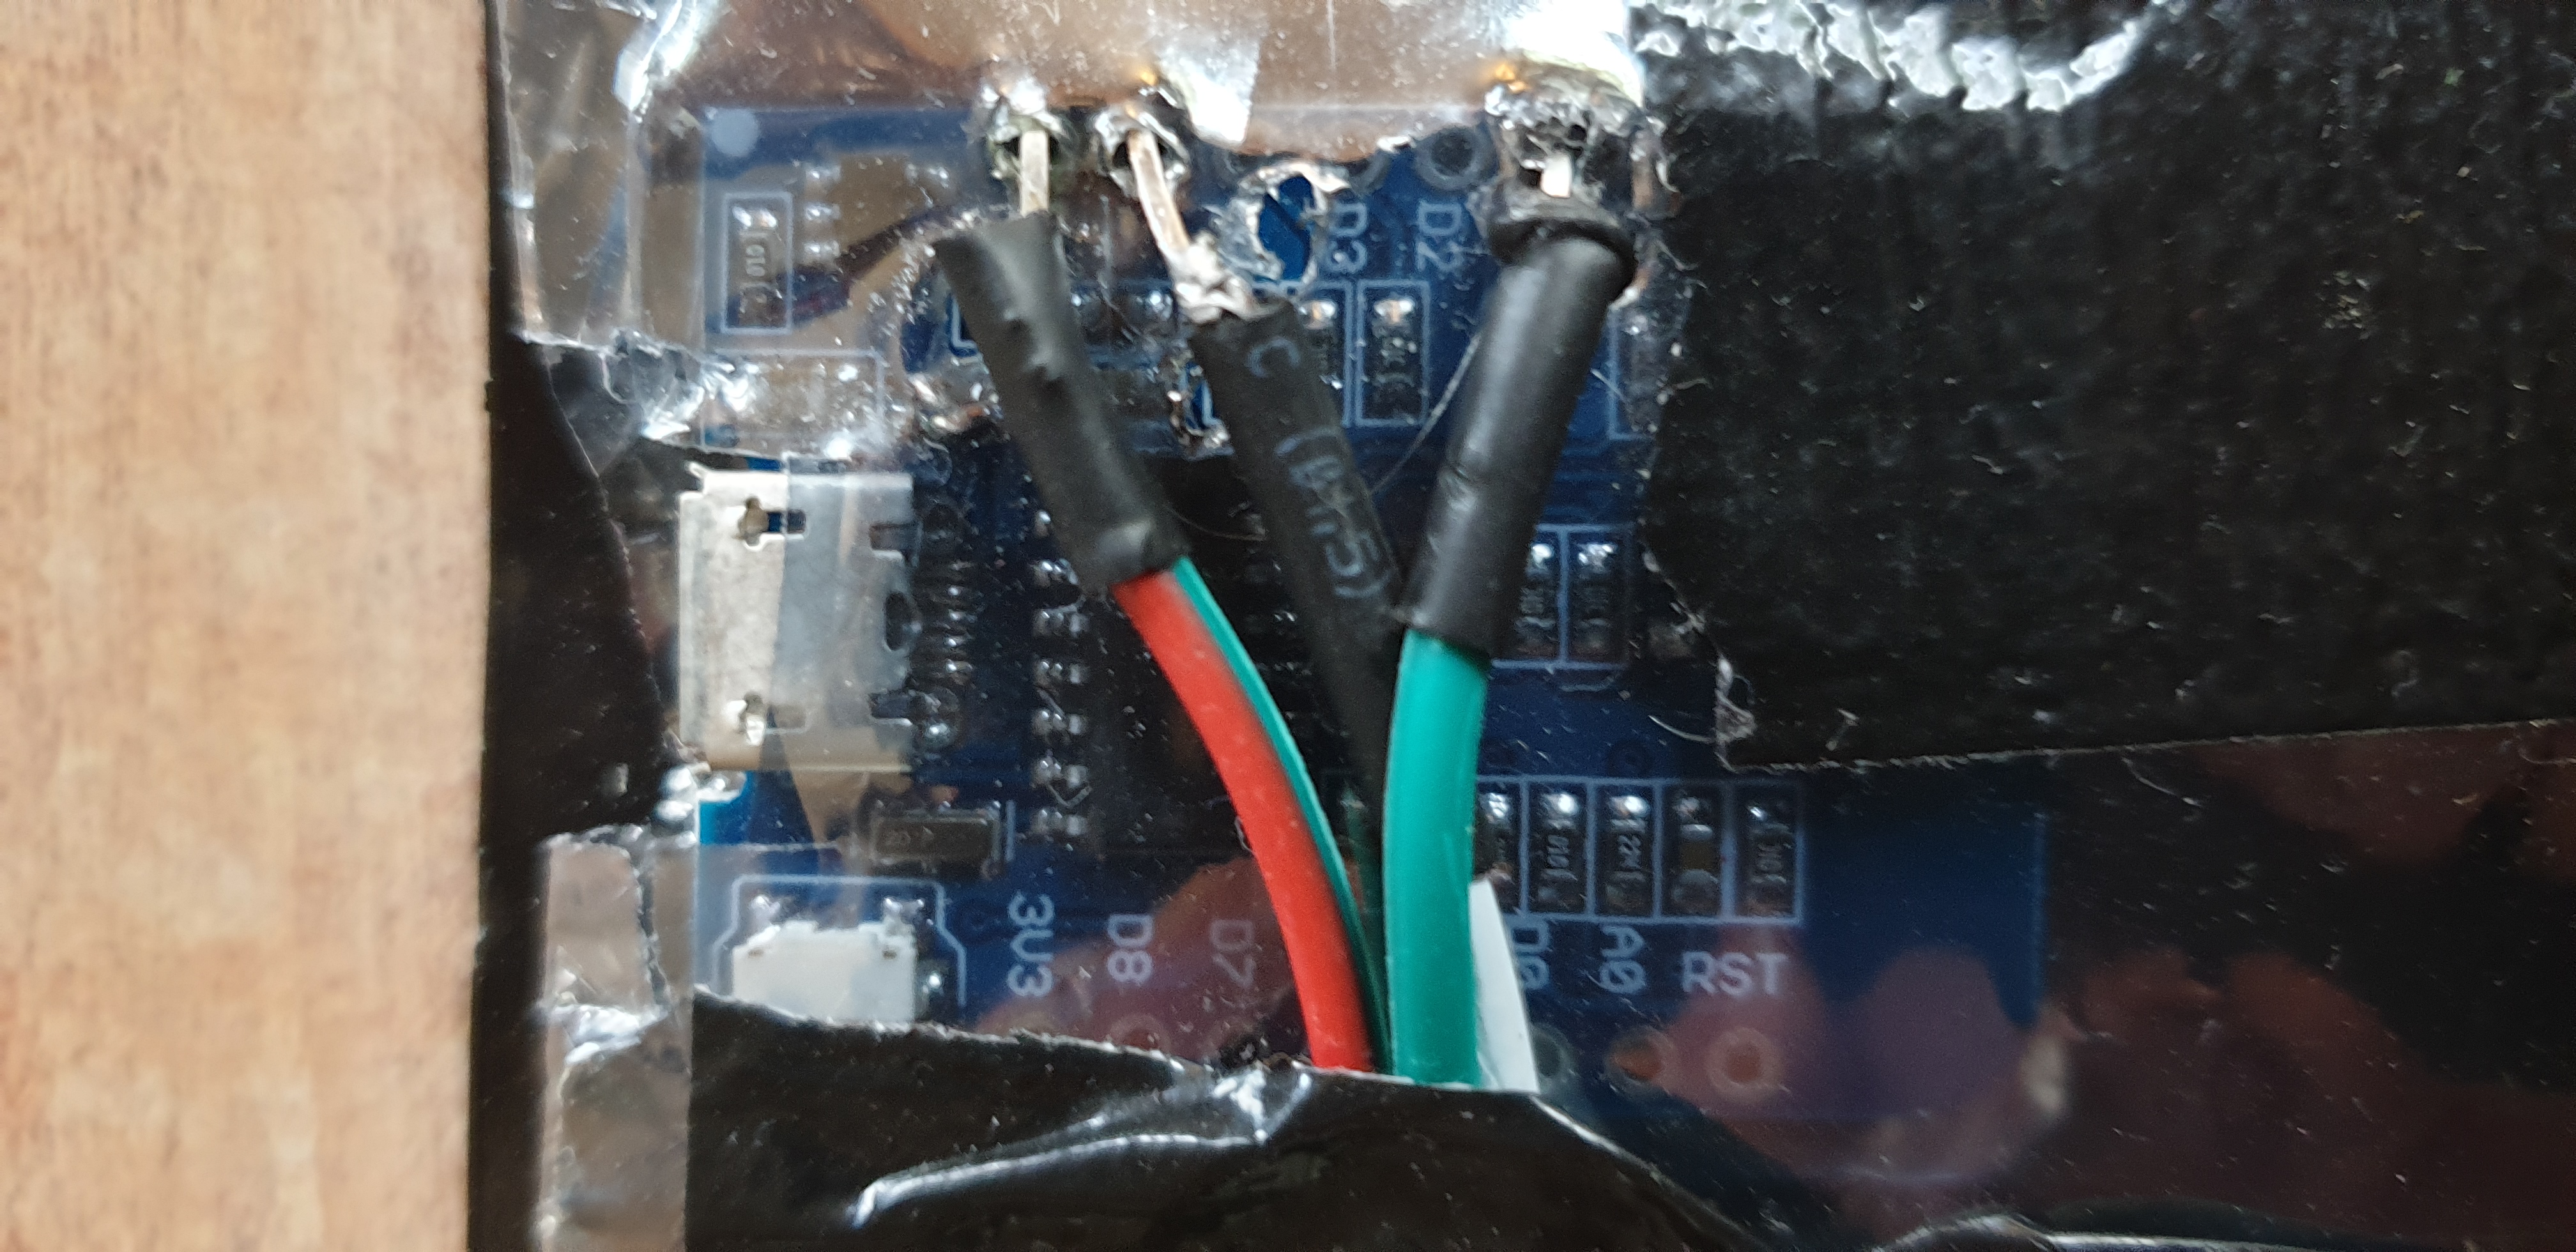
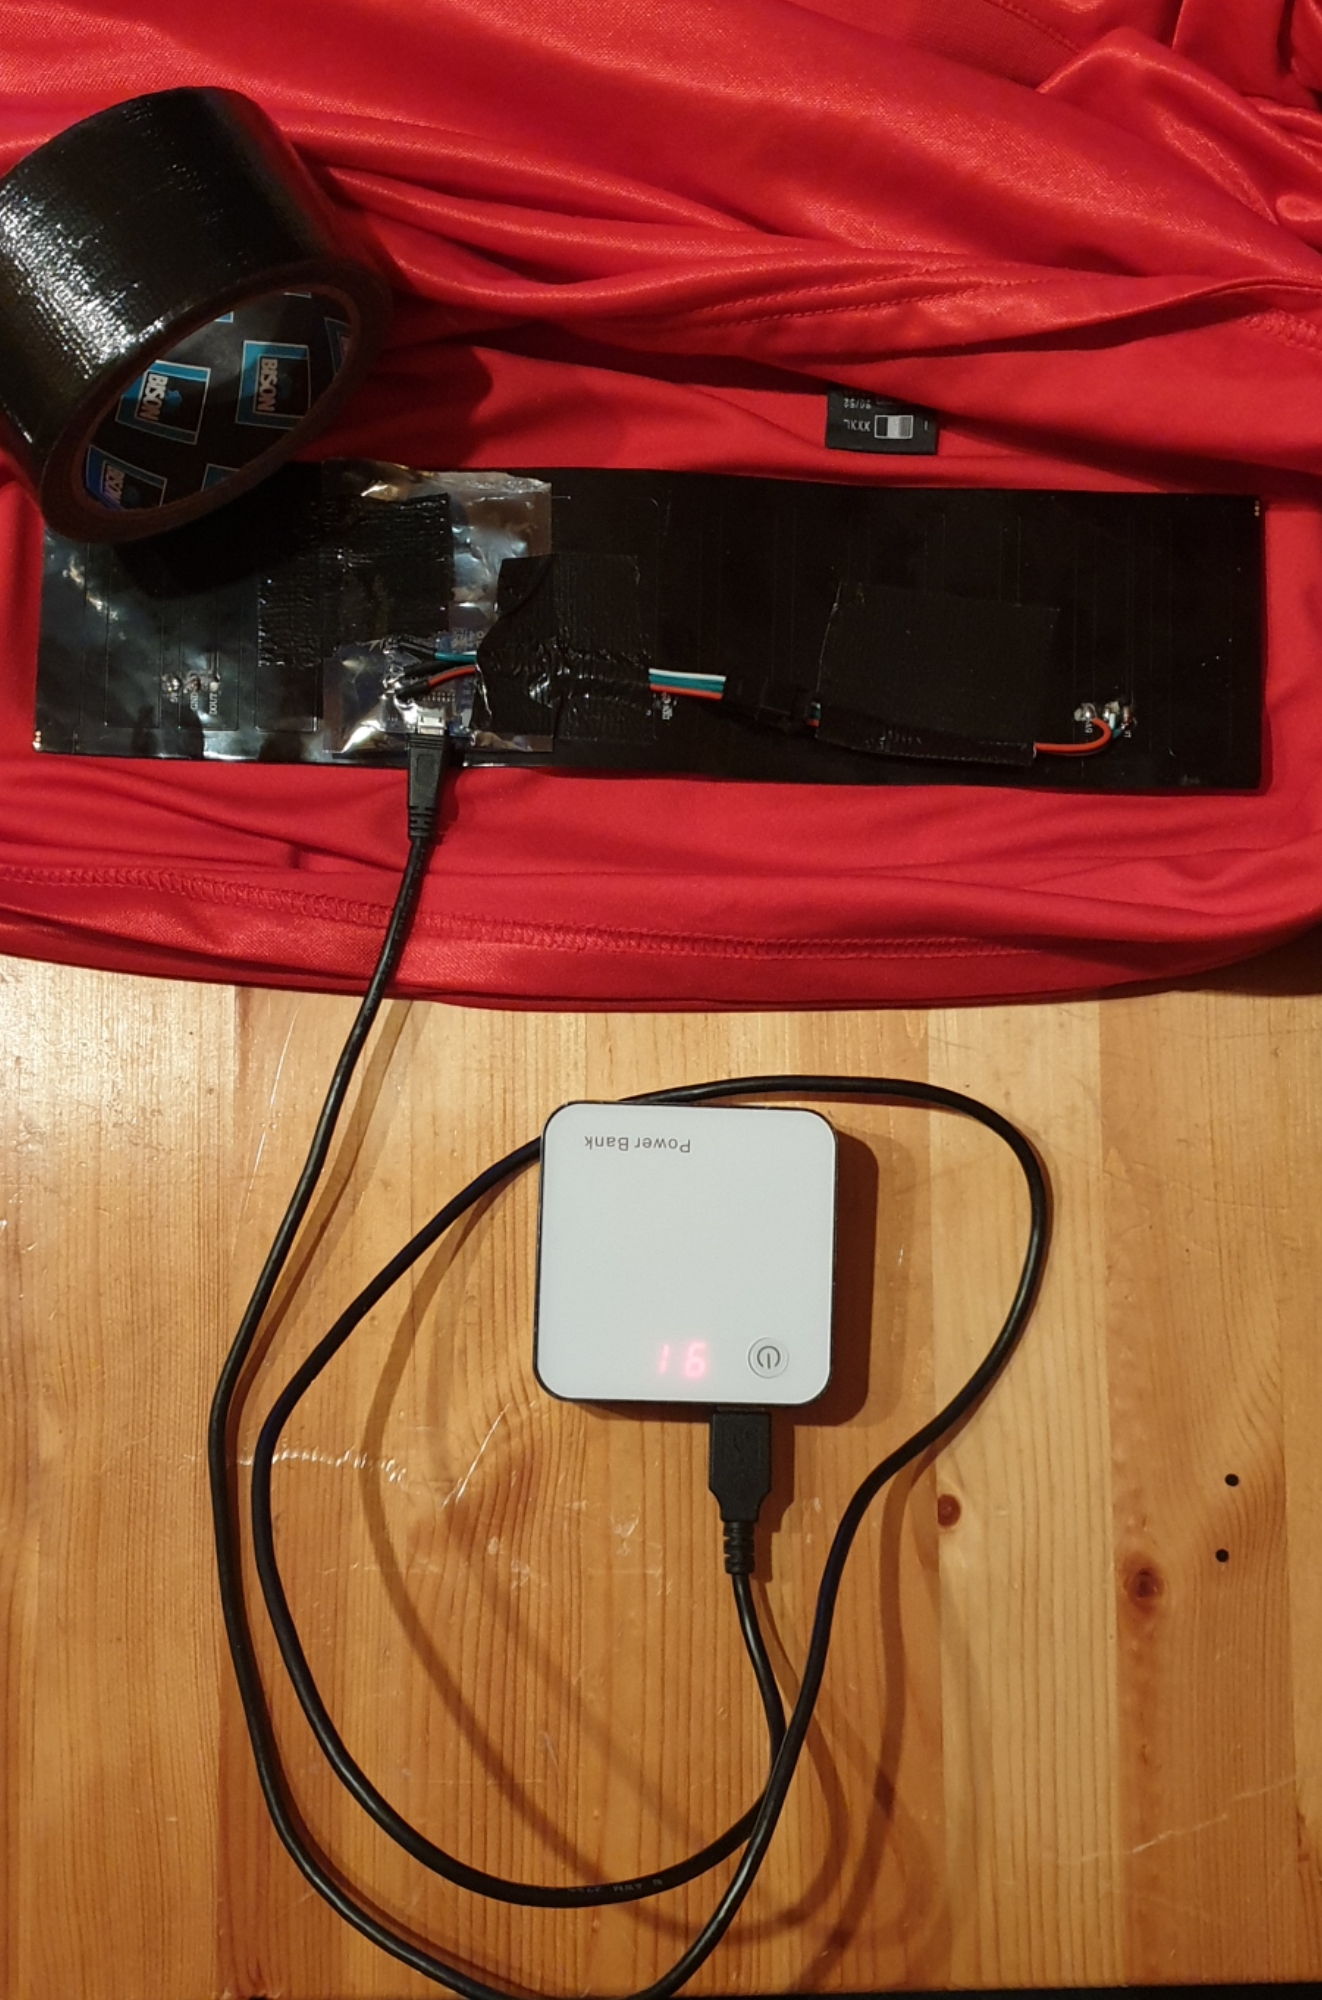
- Connect (solder) the ESP according to the videos above to the LED Matrix (only 3 connections!). Connect Ground, 5V and the DATA pin of the LEDMatrix to the according pins of your ESP. Everything can be found in the pinout documentation of the ESP you’ve chosen. The LEDMatrix is powered by the ESP. And the ESP itself gets powered from your powerbank via USB.
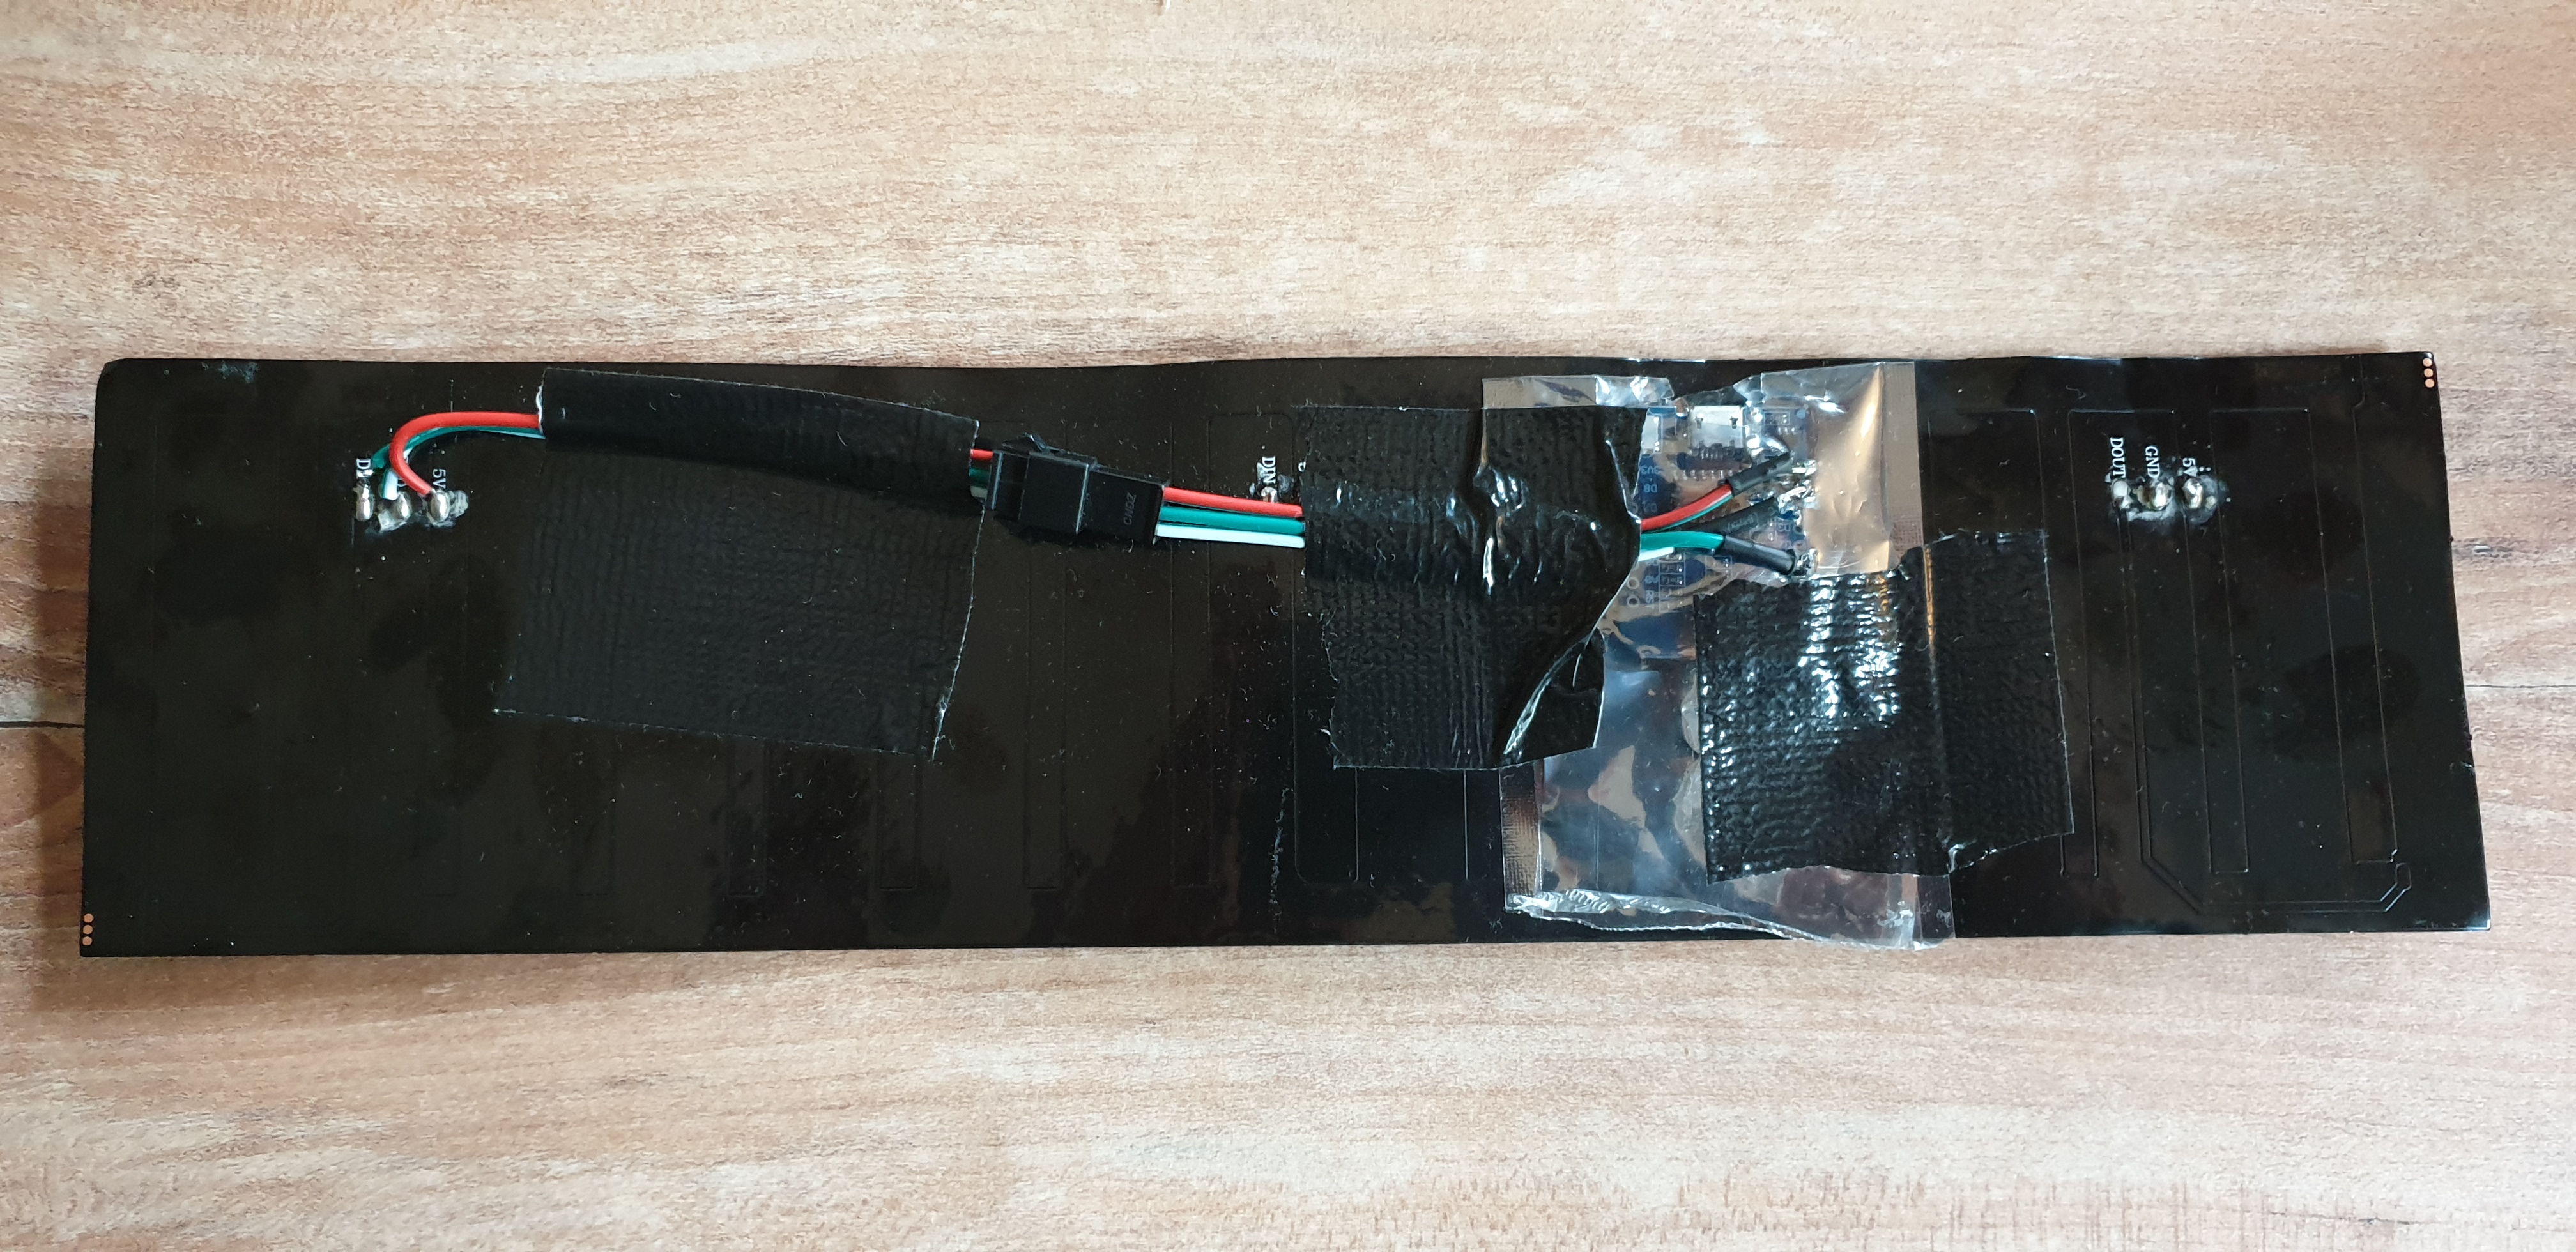
Afterall fix it to the inner side of your t-shirt. I used duck tape for it.
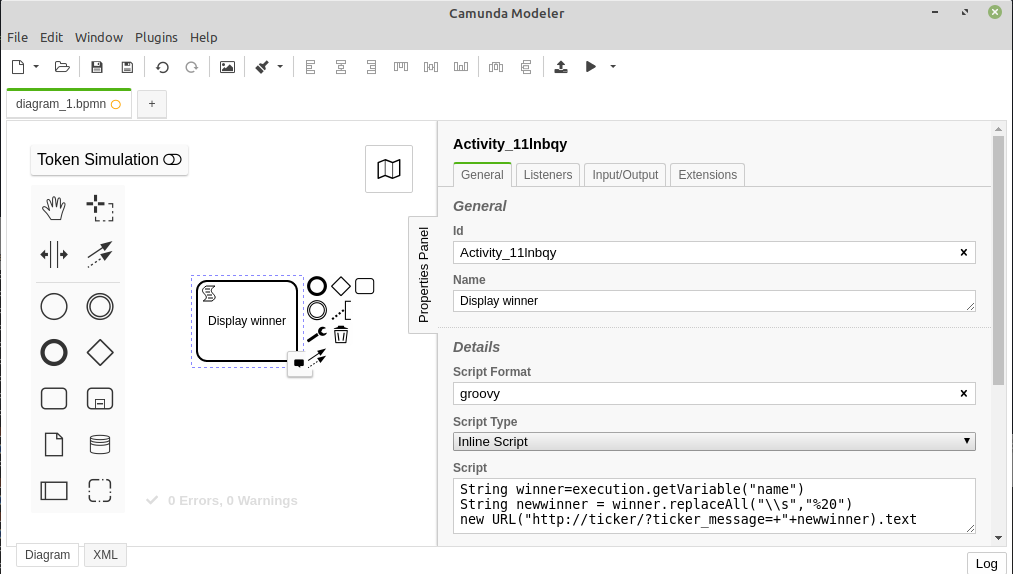
If you’ve configured your Wifi correct you should see wifiticker or something like this in your network. Open http://wifiticker in your browser and you can control the ticker text / on / off easily. It should be selfexplaining. For remote access the ticker just use
http://wifiticker/?ticker_message=+HelloWorld
in a HTTP Client of your choice.
This can be easily used when calling via key press from my pebble smartwatch (App: SendMessage) or called from within a BPMN process as shown in the
Camunda Modeler